This week has been a varied one - one minute we are riding down a trout filled ‘Le Tech’ river in beautiful sunshine - tired after having just passed through a woofing station on the way home to overcast UK autumn.
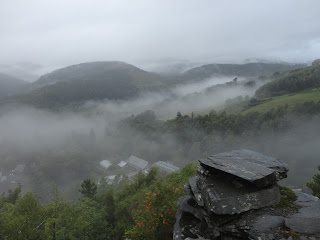
By the week-end, I am in the Welsh hills - enjoying a very stimulating course at the Centre for Alternative Technology.
Rowland Keable delivered a fantastic and informative ( both theoretical and practical) 3 day course on methods of producing rammed earth structures.
The typical weather drove us from our preferred location to having to build prototype under the eaves of a barn.
We began to build form. The shutter can be created in numerous ways. We proposed to build with a simple form that could be created in the most basic of settings. This process of setting up was the most time consuming - but it crucial that the form be structurally sound.
The earth has to contain enough mixed sized aggregate and clay to increase and aid it’s cohesion after being rammed. Clay becomes a pretty essential element acting a little like the glue - a clay particle is smaller than a red blood corpuscle and cleverly knits together the various aggregates with the addition of enough water.
It is essential to test soil both for its moisture content and ability to crush together and hold its form.
We tested a block and then progressed to testing soil under usual stress method.
Take handful of mixture compress two fisted and drop onto board from shoulder height - if it breaks into 3/5 regular pieces it is ready.
If is is decimated, there is not enough moisture content and if if stays as one block, you need to add more dry soil.
The rammed earth once fully compacted - takes on a different sound - it has a wonderful resonant tone - but an equally good test is to try and push finger print into surface - the stiletto/elephant effect.
The completed prototype corner with arch opening - may not have been the straightest or prettiest wall - but everyone felt that it was a meaningful introduction to the process.
On the last night, Rowland showed us a selection of his work from across the world - and a few images of how dynamic and surprisingly earth can be used and formed. These two projects were reproduced by kind permission of http://www.rammed-earth.info/
I found the chalk rammed project with its wonderful curved surfaces and the fabric formed structures particularly inspiring.
The earth remained vulnerable until it had fully dried - dried out too quick it would shrink and crack and too much moisture content would force earth to swell and the structure would be undermined.
Although it is a very different beast to lime - it shared a lot of its characteristics. It was humidity regulating, it had thermodynamic properties, absorbed odours and is a breathable surface.
The surface could be dressed at a later date with lime plasters. In Morocco, the rammers polish off the surface using flat river stones - larger than those used for tadelakt.
I tried a tadelakt stone on our rammed earth wall - it did polish and compress the surface - but weirdly - I felt that this dressing took away from its authentic ruggedness.


